.png?width=200&height=66&name=logo%20(1).png "HomesAlive Pets Canada")

Do I need to clean my cat's ears? Cats are natural groomers, but their ears are the one spot they just can't reach on their own. Learn how to clean a cat's ears safely and keep your cat healthy and happy.
Ears are one area of your cat's body that often gets forgotten when it comes to grooming. Cats are adept self-groomers and, depending on their fur type and diet, might not require a lot of intervention from you to keep them clean and healthy when it comes to their self-care routines.
However, there are a few jobs that they just can’t do on their own, like cleaning their ears.
Why should you clean your cat's ears? Ear cleansing may not be the first job that comes to mind when you think about grooming your cat at home, but routine ear maintenance can help prevent or identify other health issues.
Dirty Cat Ears Can Be a Sign of a Bigger Problem
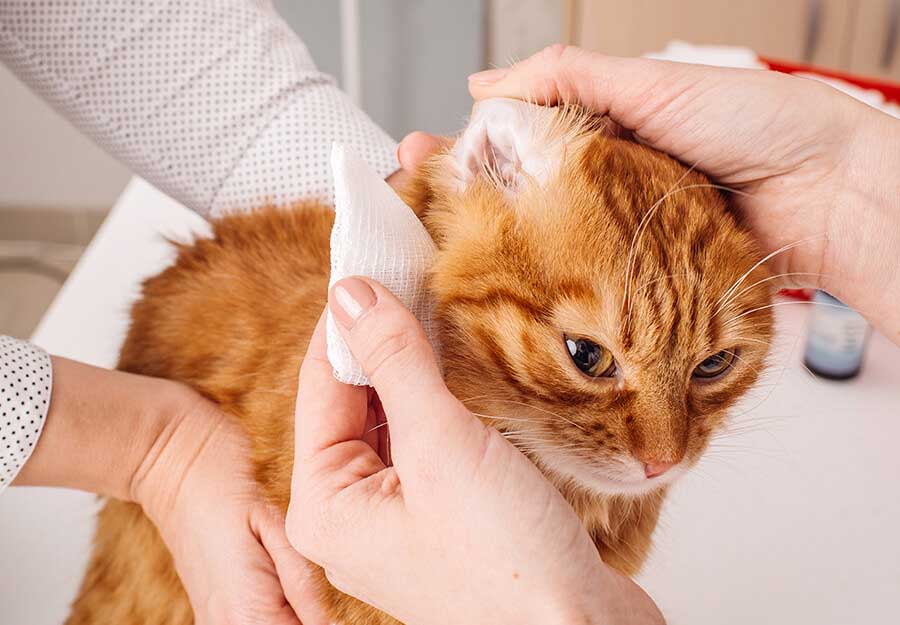
 Routine ear cleaning is important for getting rid of ear wax, debris, and bacteria that can lead to irritation, but it’s also a great way to catch other issues. Just like any other grooming routine, you can take the opportunity to do a visual check of the ear and look for anything out of the norm.
Your cat’s ears may look dirty before cleaning, but the skin should be free of abrasions, inflammation, and irritation. Excessive scratching, pain when touched, or funky smells are also signs that the problem is more than just a little bit of ear wax.
Here are a few common ear issues to be on the lookout for:
Ear Mites
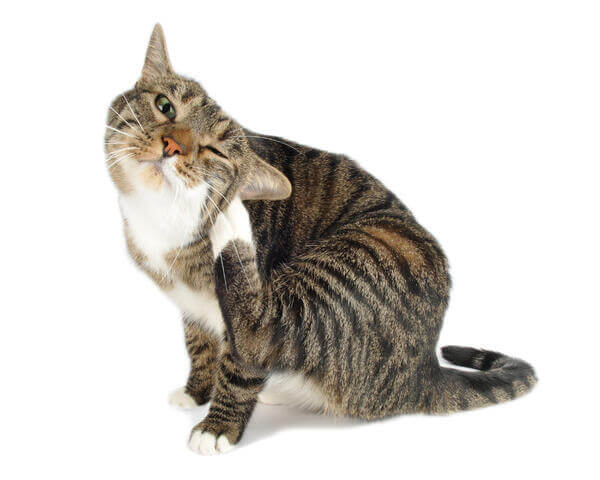
Look for signs of ear mites in cats. These teeny tiny pests can be very irritating for your cat. They are drawn to the warm, dark areas of the ear canal, and they thrive on a diet of dead skin cells. Unchecked ear mites can drive your cat crazy, causing her to scratch and shake to the point of injury.
Mites are microscopic, so you can’t see them like you can fleas or ticks, but they do leave behind debris that is typically easy to notice. Unlike typical ear wax and debris, ear mites leave behind debris that looks like small flecks of dirt. Think coffee grinds or black sand.
Treating ear mites isn’t difficult, but the earlier you spot the signs and symptoms of ear mites in cats and start treatment, the easier it is to evict these little pests.
Over-the-counter ear mite treatments can be purchased from your local pet store or from your vet’s office. Severe infestations can be harder to treat, and checking in with your vet first is the safest solution.
Learn more about ditching these annoying pests in Treating Ear Mites in Cats.
Yeast
If your cat’s itchy ears are accompanied by a funky smell, then you might be dealing with a yeast issue. A common symptom of an allergic or digestive reaction, yeast, a fungus, thrives in dark, warm, and moist areas, like the deep crevices in the ear canal.
A common cat ear yeast infection natural treatment is diluted apple cider vinegar. It can balance skin pH and kill off live yeast, but it won't prevent the yeast from returning.
Yeast problems can be tough to get rid of, though, so although ear cleanings can help, they are just a band-aid for a cat ear yeast infection. You must determine what is causing the yeast, whether it be food, environmental allergies, or poor digestion.
Your vet can be a great resource for solving this issue. They can help you make changes to your pet’s diet, environment, and overall health that will solve the underlying issue that allows yeast to thrive.
Injury
A small cut or wound can become a problem, especially if your cat is fussing over the injury. Their natural grooming routines are meant to help prevent infection, but scratching and licking can irritate the skin around the wound, causing it to worsen.
Check for abrasions on the skin that may be irritating your cat and treat them with disinfectants, like Thrive Silver Shield or other wound treatments. It's best to completely heal the injuries before resuming your cat's regular ear-cleaning routines.

Once you’ve ruled out these external factors, you can get back to a consistent cat home grooming routine to keep your pet healthy.
How Often Should You Clean a Cat’s Ears?
As natural groomers, cats tend to keep themselves pretty clean, but their ears are one fo the few areas that they may need a little help with. Cats typically don’t need their ears cleaned more often than once per month, if that. Cleaning a cat’s ears should be done on an as-needed basis.
The frequency of cleanings can be dependent on external factors like their environment, diet, or health issues, like allergies. Even the shape of their ears and their genetics can affect how quickly gunk and bacteria build up in their ears.
It’s best to check their ears weekly for dirt, wax, and irritation. This will be the best indicator as to whether they need a cleaning. Try not to clean your cat's ears too often unless it’s necessary or recommended by a vet.
Here are some signs that your cat might need their ears cleaned:
-
- Visible dirt or wax build-up in the ear canal
- Redness of the skin
- Scratching or excessive self-grooming of their ears
- Tenderness when touched
- Head shaking or tilting
- Smelly or yeasty ears
Caution: If you see open sores, bleeding, blisters, pus, or swelling, you should contact your vet immediately. These could indicate infection and need to be addressed quickly to prevent the issue from getting worse. Ear cleaning solutions can sting if used on open wounds, so ask your vet when you can clean their ears after the infection has been remedied.
Another good time to clean your cat’s ears is before and after a cat flea, tick, or mite treatment. Cleaning their ears before and after can clean out debris and bacteria left behind by pests.
Just like bathing and brushing your cat, over-grooming your cat's ears can lead to some unintended consequences. Frequent and unneeded cleanings can dry out the sensitive skin in their ears, which can cause irritation, which kind of defeats the purpose.
Now that you know why you may need to clean cat ears, the next sections will teach you how to clean your cat's ears safely and in the comfort of your own home.
Preparations for Cleaning a Cat’s Ears
Some cats don’t mind being pampered, while others oppose a kitty spa day. How you groom your cat will depend on both your and their comfort levels with the grooming process.
If you’ve never cleaned your cat’s ears before, or if your cat is a bit prickly when it comes to being fussed with, then make sure you read through the steps in the next section on cleaning your cat’s ears and the tools that you’ll need to do it safely and correctly.
Tools for Cleaning a Cat’s Ears
Before we break down the steps and tricks to cleaning a cat’s ears, you’re going to want to make sure that you have the right tools for the job. Here’s a list of the things that we recommend you have on hand to clean a cat’s ears:
-
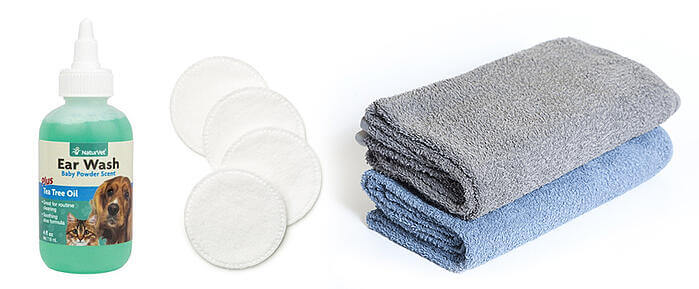
- Cat ear cleaner
- Cotton pads or makeup pads (do not use Q-tips or anything that can go deep into the ear canal)
- Towels
- Pet wipes
There are many different cat ear-cleaning solutions, but if you are wondering which is the best ear-cleaning solution for cats, try Tropiclean Alcohol-Free Ear Wash. It is a cat-friendly ear cleaner that can loosen debris, relieve odour, and itching.
Want to know how to clean a cat's ears naturally? Some people prefer to use natural products with recognizable and pronounceable ingredients, like Naturvet Ear Wash. Natural ingredients like witch hazel, tea tree oil, and aloe vera help to clean, dry, and condition delicate ear skin.
Even cats who are familiar with a variety of grooming practices can be uncomfortable with the experience. Try to keep your grooming routines to a calm, quiet area of the house where there are no distractions, like other people or pets.
This will help keep you and your cat more relaxed and make the process that much easier.
How to Clean a Cat’s Ears in 10 Simple Steps
%20(1).jpg?width=800&height=1923&name=Cat-Ear-Cleaning-Infographic%20(1)%20(1).jpg)
1. Encourage Calm, Relaxed Behaviour
The best way to start any grooming session is when your cat is calm. Help her relax by giving her some slow, gentle pets or a neck rub. You want her to associate grooming with positive feelings, so showing her some love is a great way to start.
You also want to encourage a calm and temperment. So skip play time and toys. Just gentle strokes around the neck and back to lull your cat into relaxation. Calming aids, like Feliway, can be used to help with cats that are typically more high-strung, hyper, or anxious.
2. Practice Touching the Ears
If your cat is typically a little squeamish about her ears getting touched, you may need to spend some time before you start any grooming processes with some desensitization. Gently massaging the neck and ears while offering high-value cat treats can help your cat become more comfortable with being handled.
For cats that don’t mind you fussing with them, you can massage their ears and gently fold back their ears by grabbing the tip of the ear with your thumb and forefinger. You want to pull the ear back just enough so you can get a good look inside the canal.

3. Tilt The Head Into Position
Use one hand to gently tilt your cat’s head so that the ear you want to clean is facing up. You may need to practice this a bit if your cat is fussing too much, but be sure not to hold them too firmly or try to twist their head with force, as this can be dangerous.
This may be easier for some if your cat is lying down on their side. The ear will already be facing upwards, so all you will need to do is gently hold their head in place. If your cat won't cooperate, wrapping her up into a little kitty burrito with a clean towel can help to hold her still and calm her.
4. Apply the Cleaner
With your other hand, grab the ear wash solution and tilt the nozzle into your cat’s ear canal. Slowly squeeze the cat ear cleaner directly into the ear canal.
The faster you squeeze the cleaner into her ear, the more likely your cat will be startled, so go for a slow but steady stream. You want enough liquid that the ear canal is partially filled (less than half full).
Your cat will instinctively try to shake the cleaner out, so you’ll need to work fast. You may need to brace her head with one hand while you are applying the cat ear wash.
5. Massage the Ear
With your free hand, place your thumb and forefinger at the base of the ear and gently massage the ear from the outside. This will allow the cleaner to get into the deep crevices in their ear canal and loosen debris and wax that has built up.
6. Step Back and Let 'er Rip
The next step is the messy part. Let go of your cat’s head. Keep one hand on her body to keep her from taking off, but allow her to shake out the cleaner from her ear. And shake she will.
This will send cat ear wipe cleaner flying all over the place, so use one of your towels to drape around your cat and prevent the splatter from coating you and your surroundings.
7. Tidy Up
Once your cat has shaken out the excess cleaner, you can do some manual clean-up. Grab a pet wipe or use the towel to dry her off a bit and wipe away any cleaner that might have flung onto her.
Your cat will want to groom herself after you are finished, so try to wipe away any excess cleaner. Use a damp cloth if needed, and then dry her off with a clean towel when you are done.
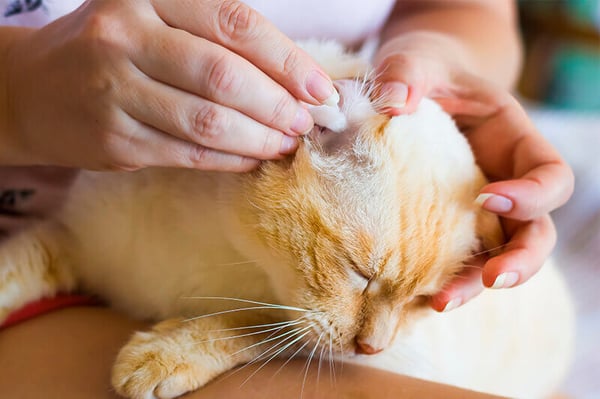
8. Wipe Down the Outer Ear
Next, grab a cotton pad and pour a little cat ear cleaner on it. You want it to be damp but not dripping. Use the pad to wipe down the ear and any debris or dirt that has been loosened. Don’t go too deep, though. You only want to wipe out the areas of the ear that are visible.
Small folds and crevices in the upper ear are most likely to collect debris, so use the pads to try to wipe these areas clean. Depending on how filthy her ears are, you may need to change pads if the first one becomes soiled quickly.
9. Repeat These Steps on The Other Ear
Repeat this process on her other ear. Always use a new, clean cotton pad for the other ear problem. If there is any infection or bacteria, you want to avoid passing it to the other ear.
If your cat was startled by the first ear, expect a slightly bigger reaction this time. You can take a break between ears and offer some cuddles or treats to lower anxiety levels.
10. Reward Your Cat's Patience
Lastly, end your grooming session with a reward. A high-value treat, her favourite toy, or even some much-loved head scratches will show her that she did a good job and help her associate ear cleaning with something she loves.
Don't expect to be good at this right away. With these steps and lots of practice, your cat will get used to this grooming practice, but it may take several tries to get there.
Once you know how to clean your cat's ears, you can make it a regular part of your kitty's grooming routine.
Tips for Cleaning a Cat’s Ears
You may have read these instructions and thought, “There is no way my cat would tolerate this!”
Don’t worry. We know that an ear cleaning isn’t exactly a natural feeling for your cat, and their response may be less than enthusiastic. Fortunately, we have a few tricks for how to clean out your cat's ears that will help make the process a little easier and safer for you and your cat.
The Purrito Technique
If your cat is nervous or is showing any signs of aggression, a good technique for keeping them still and helping them stay calm is called the Purrito. Like swaddling a baby, the Purrito technique involves snuggly wrapping your cat in a towel to limit their movement while keeping them safe. Here’s a quick breakdown of the Purrito wrap technique:
-
- Lay the towel flat and place your cat diagonally in the center, on her belly.
- With one hand on her back, keeping her still, grab one of the corners of the towel to her side and fold it over her back. Pull your hand out and place it on top of the towel on her back
- Use your free hand to tuck the excess towel underneath her.
- Grab the back corner of the towel and bring it up and over the first fold. You want this fold to be snug enough that it prevents her from moving, but not so tight that it’s uncomfortable.
- The towel shouldn’t cover her head, so fold back any excess so the towel covers her neck but not her ears. Be mindful of the placement of her tail, too.
- The remaining side corner can now be pulled across and snugly tucked underneath her body. This will keep her in place, but will also hold the other flaps of the towel in place.
- She should now look like a kitty burrito, hence the fun name - Purrito.
- The last flap will be in front of her. This flap can be folded gently over the shoulder on the same side as the ear you are cleaning. Try to tuck the corner into the towel flaps at her back. This step prevents her from moving forward, but will also help keep her head elevated while you clean her ear.
- The front flap can be moved to the other side when you are ready to do the other ear.
Body Temperature Cleaner
Ear cleaning solution is naturally a little colder than room temperature. Before you use the liquid, hold the bottle in your hands for a few minutes to help warm it up a bit.
You don’t want it to be hot, so don’t microwave or try to heat up the liquid beyond your body temperature. The more appealing temperature will make the cleaner less shocking to your cat when you put it in her ear.
A Helping Hand
Any extra set of hands is helpful if your cat is extra wiggly. Having a partner to pet your cat or hold her can help keep her calm and allow you to work more quickly.
Try not to overcrowd her, though. Only use a partner if necessary, and make sure your accomplice is someone with whom your cat is familiar and comfortable.
The Clean-up
Pick an area that is easy to clean. Cleaning your cat’s ears in an empty bathtub or even just in the bathroom can help to minimize the mess and will be much easier to clean up when you are all finished.
Avoid the splatter
When your cat shakes, close your eyes and mouth, or turn your head away. Many cleaners are not safe to ingest and can cause irritation if it gets in your eyes. Keep yourself safe.
To further avoid splatter and minimize clean-up, try tipping her head down slightly before you let her shake. Allow some of the liquid to drain out onto one of your towels. She’ll still want to shake her head, but there will be much less liquid flying around when she does.
Take a Breather
It’s hard to know what kind of reaction you will get from your cat. If this is your cat's first ear cleaning, then she may get upset. If your cat is getting overwhelmed by the experience, then it’s time to take a moment to relax.
It could take multiple tries before your cat gets the hang of it, so don’t force it. Take your time and take breaks as needed to help keep your cat calm. Don't forget to have treats, food, or even cat toys on hand to reward your pretty kitty every step of the way.
How to Prevent Cat Ear Infections
Some amount of debris and wax is normal for cat ears, but frequent build-up, irritation, or unusual colours and smells are not normal. There are many factors that contribute to poor ear health in cats, but a healthy cat will have fewer issues.
The easier way to make sure your cat's skin, even the skin in their ears, stays healthy is to feed a high-quality cat food. Remember that if you put good in, you get good out.

Another way to prevent dirt buildup in your cat's ears is to keep their environment clean. This means surfaces and air. The fewer bacteria in their environment, the healthier they will be. So keep your cat's litter box clean, vacuum regularly, and avoid using harsh chemicals or smoking around your pets.
Lastly, regular vet checks can help you to catch health issues early and treat them quickly.
Cat Ear Cleaning FAQs
Is it normal for cats to have dirty ears?
Most cats have very clean ears and rarely need their ears cleaned, but there can be many things that contribute to dirty cat ears. Allergies, pollutants, pests and injury can all create waxy or greasy build-up.
What is the black stuff in my cat's ears?
If you start to notice a build-up of black gunk in your cat's ear, it could be a sign of ear mites. Though mites are too small to see, the waste they leave behind is dark brown or black.
Can I use Q-Tips to clean my cat's ears?
Never. Cotton swabs are dangerous to use in your cat's ears. Nothing should be inserted into your cat's ears except for cleaning solution. Wipe the outer portion of the ear with a cotton pad, but don't try to reach into the canal.
What colour is normal for earwax in cats?
Cat earwax is light to medium brown and should not give off a sharp or cheesy odour. Darker build-up, scabs, or a strong, unpleasant odour are signs of a more serious issue.
.jpg)
